
You can now set up custom Reporting fields to classify and track your transactions on Aspire!
Reporting fields allow you to capture specific details about your transactions for internal tracking purposes. They can be applied to transfers, bills, cards, and claims. Once populated, these fields can be easily exported or integrated with Xero.
Please note that only Admin, Finance with transfer rights, and Finance with submit-only rights users have permission to create and manage Reporting fields. Finance users without transfer or submit rights, as well as Employee users, do not have this permission.
However, all users can fill out these fields when initiating transfers, submitting bills, submitting claims, creating new cards, or editing existing transactions.
Create new reporting fields
On your Aspire dashboard, go to "Accounting" in the right side and select "Reporting Fields" (web app). On the mobile app, go to "Menu", and then select "Reporting Fields".

You can then select "➕New Field" on the top right-hand side to create a new reporting field and set the following details:
Icon - choose the icon of your field
Field name - place name of your field
Required field - Toggle this option to mark your field as mandatory
Helper text - place a description of what the user should fill in
Field type - choose the Dropdown option to provide users with a list of options to choose from, or Free text to allow them to enter any value

Once complete, click on "Add a reporting field"
Once you have created a new reporting field, it will be accessible when you input information for your transfers, refunds, cards, claims, and bills.
Edit existing reporting fields
On your Aspire dashboard, go to "Settings" in the upper right corner and select "Reporting Fields" (web app). On the mobile app, go to "Account", choose "Settings", and then select "Reporting Fields".
Click on the field name you want to edit (note you can only edit "active" fields)
Click on "Edit field" on the upper right part of the page
You can edit the Field name, Icon, Required field, Helper text, and Field Type
Once done, click on "Save changes", and the updates will reflect instantly
Notes: You can also filter Reporting fields by Status (Active/ Inactive) or Type (Dropdown/Free text).
Deactivate or delete reporting fields
Note: Default fields cannot be deleted or deactivated.

On your Aspire dashboard, go to "Settings" in the upper right corner and select "Reporting Fields" (web app). On the mobile app, go to "Account", choose "Settings", and then select "Reporting Fields".
Click on the field name you want to deactivate/delete
Click the three-dotted menu button on top, then hit "Deactivate" or "Delete"

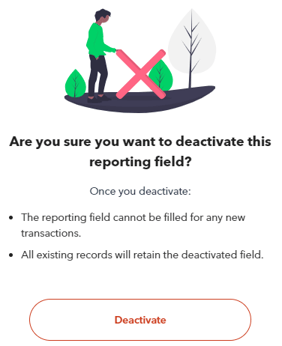
If you have previously utilized the reporting field in past transactions, you can deactivate it. If you have never utilized the reporting field in any transactions, you have the choice to either delete it from the list or simply deactivate it.
When you deactivate or delete a field, all existing transactions where the field was already filled will be retained.

Note:
You cannot delete a reporting field that has been previously used.
Do not delete the reporting fields that you have created while the transaction is in progress.
How to fill out the reporting fields
Users can fill in the custom reporting fields when they initiate transfers, submit bills, submit claims, create new cards, and edit existing transactions.
When initiating new transfers from your Aspire Debit Accounts, you will be able to view your active reporting fields on the Transfer details screen. Simply click on the fields to select and fill the value for them.


Your reporting fields will also be visible when creating new Claims and Bills. When the claim or bill transfer is submitted, the values entered at creation will be automatically filled in for the transfer.

When creating or editing cards, you can set up default values for each Reporting field for the card. All transactions made on the card will automatically have these values filled in. You can update the values for any transaction if required.

To make changes to the reporting fields on transfers that have already been sent, you can navigate to the "Transactions" tab and select the specific transaction you want to edit:

Can Reporting fields be used with Aspire's Xero & NetSuite integration?
Yes, you can set up custom Reporting fields with the same names as your Xero and Netsuite tracking categories, so that the values are automatically filled when using our Expenses or Bills sync features.
If an Aspire reporting field is edited or deactivated, your Xero/Netsuite Chart of Accounts will not be impacted. All expenses and bills that are already synced will remain in the original ledger itself.
If you have mapped the category to your Xero/Netsuite ledger account, the same will be unmapped.
How to view analytics for reporting fields
On your Aspire dashboard, go to "Settings" in the upper right corner and select "Reporting Fields" (web app). On the mobile app, go to "Account", choose "Settings", and then select "Reporting Fields".
Select the specific field name you want to view, and a pane will slide from the side:
To view analytics for the reporting field, click on the "Analytics" tab. You can toggle between different date ranges.

To view analytics for a specific reporting field option, select the option under the "Overview" tab. A new panel will appear, and then go to the "Analytics" tab to access data for the specific option. You can toggle between different date ranges.

Questions? Chat with us by clicking on the messenger icon at the bottom right of the screen once you are logged in.