There are two ways to pay a claim: use the Aspire debit accounts directly or process the payment externally and mark the claim as paid in Aspire.
Once a claim is approved by the assigned reviewers according to your Claim Review Policy, an Admin or Finance with transfer rights user can either mark the claim as paid or process the payment using the Aspire debit accounts.
If associated with a budget, the Budget Owner with transfer rights can also process the claim payment.
Note: Hong Kong-incorporated businesses can only mark the claim as paid and cannot use the Aspire debit account for claim payments.
How to pay Claims using an Aspire Debit Account
How to pay claims in bulk
On your Aspire dashboard, click "Claims" in the left navigation bar (web app) or click "Menu" and choose "Claims" (mobile app).
Click on "Pay approved claims" at the top
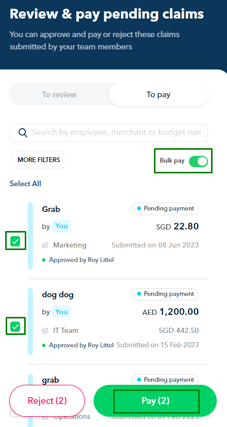
Tick the "Bulk pay" button, then select the claims you want to pay in bulk
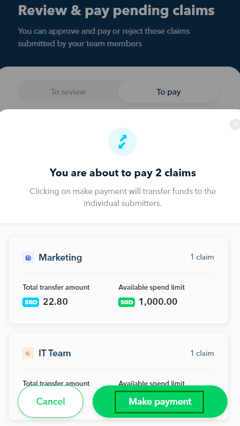
Click "Pay", then "Make payment"
How to schedule a claim payment
On your Aspire dashboard, click "Claims" in the left navigation bar (web app) or click "Menu" and choose "Claims" (mobile app).
Click on "Pay approved claims" at the top
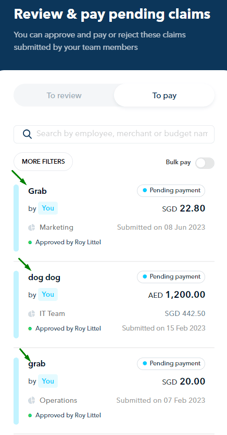
Select the claim from the list, then click "Pay now"
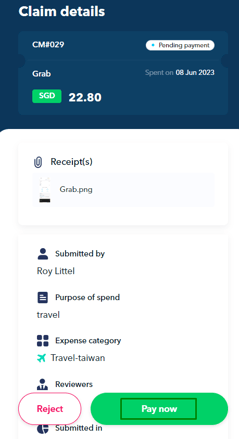
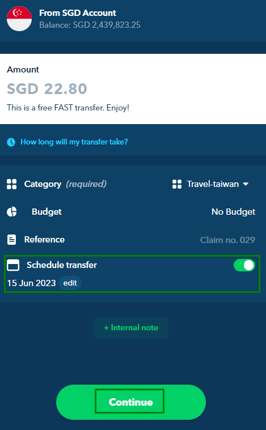
Select "Modify payment", then click on "+ Schedule" button. A pop-up box will appear where you can place your desired transfer date, then hit "Continue"
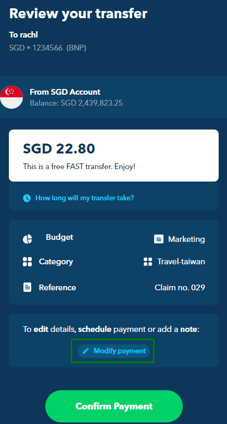
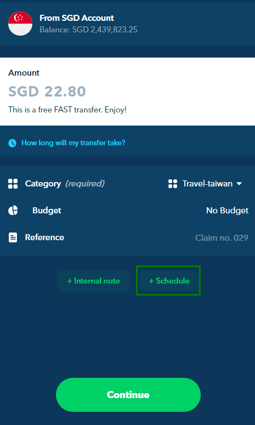
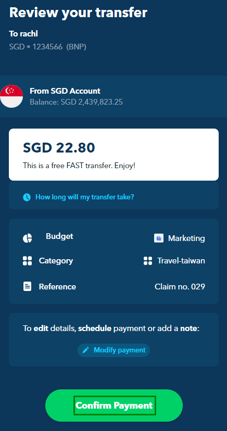
You should see the scheduled transfer date on the claim payment once done. If transfer details are good, click "Continue" and then "Confirm Payment"
For more information on Budget owners and their approval rights for claims see our article here.
How to mark claims as paid
Once claims are paid outside of Aspire, Admin, Claim Approvers, and users under the Transfer Approval Policy have the option to mark them as paid. They may mark claims as paid when the claims are in either the "Pending Review" or "Pending Payment" stage.
Claims in Pending Review stage
Select the relevant claim that you want to mark as paid. You can also do this in bulk by accessing the "Review pending claims" button.
Next, click "Approve", and choose "Approve and mark as paid"
Once you're sure, hit "Yes I'm sure"
Claims in Pending Payment stage
Select the relevant claim that you want to mark as paid. You can also do this in bulk by accessing the "Pay approved claims" button.
Next, click "More Actions" at the bottom of the claim
Choose "Mark Claim as paid"
Once you're sure, hit "Yes I'm sure"
Note: Once you mark the claim as paid
There will be no payment made from the Aspire account
If the claim was linked to a budget, then it won't impact the budget's limit
Once the claim is marked as paid, you cannot make further changes to it.
Questions? Chat with us by clicking on the messenger icon at the bottom right of the screen once you are logged in.


