
Admin users can set up a custom Claim Review Policy that allows a wide range of users to be able to review and approve claims in your Aspire Account.
If you are an approver of claims within your organisation, follow the steps below to approve a claim:
On your Aspire dashboard, click "Claims" in the left navigation bar (web app) or click "Menu" and choose "Claims" (mobile app).

Click on "Review pending claims"

You will now see the claims available to be approved by you (and other approvers within that budget, if any)
Click on the claim and assess based on your company's internal policy. You may also view your Claim Review Policy by clicking "View Policy" from the claim details

Approve the claim if it passes, or reject it if it does not.


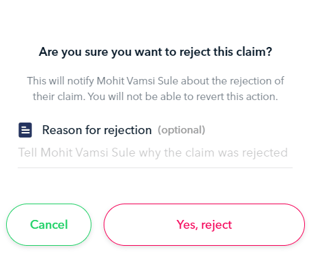
When rejecting a claim, you can provide a reason in the notes section for the employee to revise or resubmit the claim.When approving a claim, you can leave comments visible to other approvers in the "Approval timeline" tab by clicking on the
 icon.
icon.
Admins or Finance with transfer rights users can choose "Approve and Pay now" or "Approve Only". Others will see the "Approve Only" button. If "Approve Only" is selected, the claim will be sent to the Pay approved claims section where Admins or Finance with transfer rights users can make the payment.

Questions? Chat with us by clicking on the messenger icon at the bottom right of the screen once you are logged in.